
In this post you will know What is DeepSeek Janus, How to Use DeepSeek Janus Pro 7b and DeepSeek Janus Pro Download and run locally.
DeepSeek Janus Pro
DeepSeek, a Chinese AI startup, has made a major impact on the global AI industry, causing a $1 trillion decline in U.S. stock markets and competing tech guru like Nvidia and OpenAI. DeepSeek recently announced cutting-edge models, including Janus—a multimodal AI capable of creating visual data and generating images from text, A text-to-image generation model.
Discover: Midjourney Alpha Website
1. Janus
Janus is a smart AI system that handles both understanding and creating visual content using separate pathways. It uses a single powerful model to avoid conflicts between these tasks, making it more flexible and efficient. Janus performs as well as or better than models designed for specific tasks, making it a strong choice for future AI systems that work with both text and images.
2. JanusFlow
JanusFlow improves AI-generated content by combining advanced language modeling with a cutting-edge technique for creating images. Its simple design makes it easy to train within large AI systems without complicated changes. It outperforms other models in understanding both text and visuals, setting new standards in vision-language AI.
3. Janus Pro
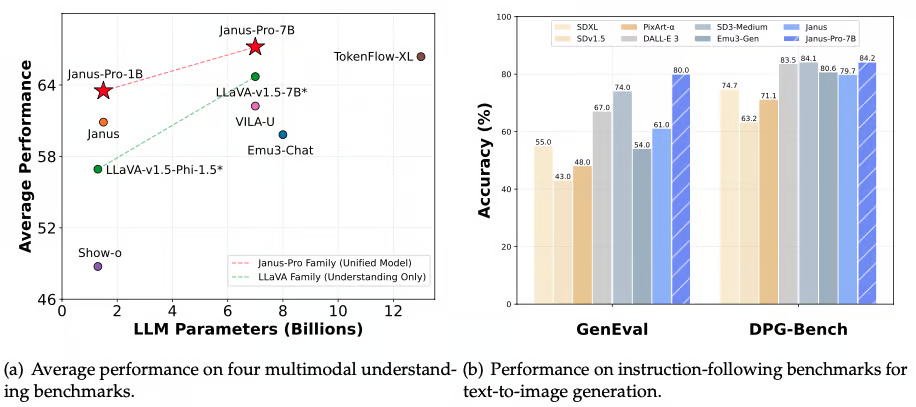
Janus-Pro builds on previous models by improving training methods, using more data, and increasing model size. These upgrades make it better at understanding multimodal content, following text-to-image instructions, and producing more stable and accurate image generation.
Also check: DeepSeek V3 – How to Use DeepSeek and Run it Locally
How to use DeepSeek Janus Pro for free ?
In this video guide you will be able to use DeepSeek Janus Pro demo for free.
DeepSeek Janus Pro Download
Janus-Pro is an advanced multimodal large language model (MLLM) designed for both understanding and generating content. Built on the DeepSeek-LLM-1.5B-base and DeepSeek-LLM-7B-base models, Janus-Pro improves multimodal capabilities for more effective text and image processing.
Setting up the Janus Project
Janus is a newly developed model, and as of now, there are no quantized versions or local AI applications available for easy use on laptops or desktops.
However, the Janus repository on GitHub provides an excellent Gradio web application demo for anyone to try. The challenge, however, is that the demo often fails to work due to multiple package conflicts.
To address this issue, we will modify the original code, make a custom Docker image, and run the container locally using the Docker Desktop application.
1. Install Docker Desktop
To get started, download and install the latest version of Docker Desktop from the official Docker website.
Note for Windows users:
If you are using Windows, you will also need to install the Windows Subsystem for Linux (WSL). Open your terminal and run the following command to install WSL:
wsl --install2. Clone the Janus repository
Next, clone the Janus repository from GitHub and navigate to the project directory:
git clone https://github.com/deepseek-ai/Janus.git
cd Janus
3. Modify the demo code
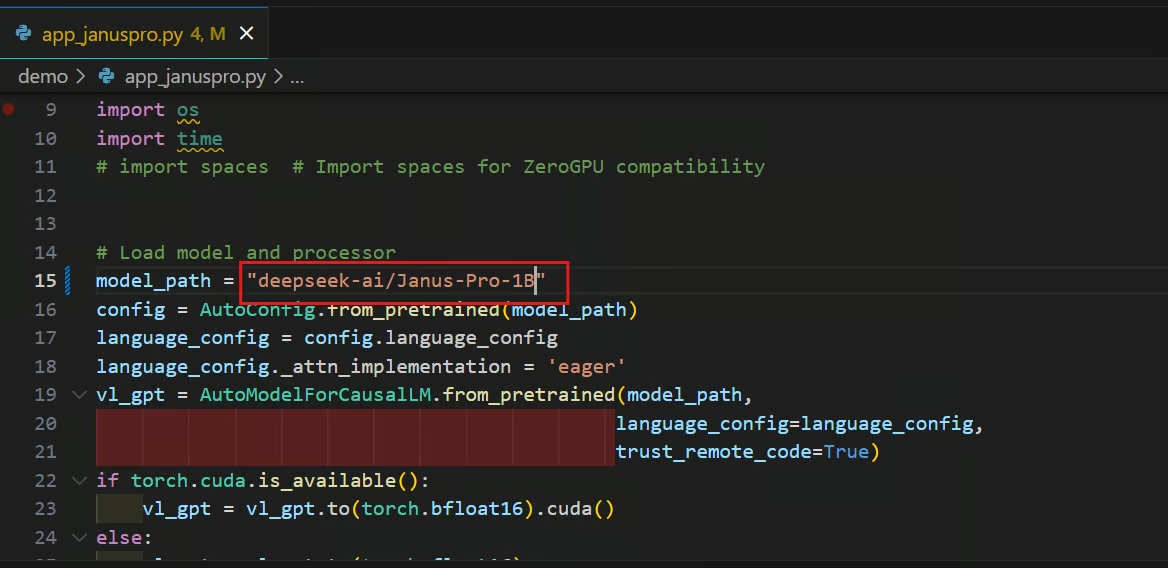
Navigate to the demo folder and open the file app_januspro.py in your preferred code editor. Make the following changes:
- Change the model name: Replace
deepseek-ai/Janus-Pro-7Bwithdeepseek-ai/Janus-Pro-1B.
This will load the lighter version of the model, which is only 4.1 GB in size, making it more suitable for local use.
- Update the last line of the script: Modify the
demo.queuefunction to the following:
demo.queue(concurrency_count=1, max_size=10).launch(
    server_name="0.0.0.0", server_port=7860
)
This change ensures compatibility with the Docker URL and port.
4. Create a Docker image
To containerize the application, create a Dockerfile in the root directory of the project. Use the following content for the Dockerfile:
# Use the PyTorch base image
FROM pytorch/pytorch:latest

# Set the working directory inside the container
WORKDIR /app

# Copy the current directory into the container
COPY . /app

# Install necessary Python packages
RUN pip install -e .[gradio]

# Set the entrypoint for the container to launch your Gradio app
CMD ["python", "demo/app_januspro.py"]
The Dockerfile will:
- Create a Docker image using the PyTorch base image.
- It will set the working directory inside the container.
- All necessary files from your local machine will be copied to the /app directory within the Docker container.
- The Dockerfile will install all required dependencies for the application.
- Finally, it will launch the Gradio application within the container.
Building and Running the Docker Image
Once the Dockerfile is ready, we will build the Docker image and run the container.
You can take the Introduction to Docker course to learn about the basics of building and deploying a Docker image.
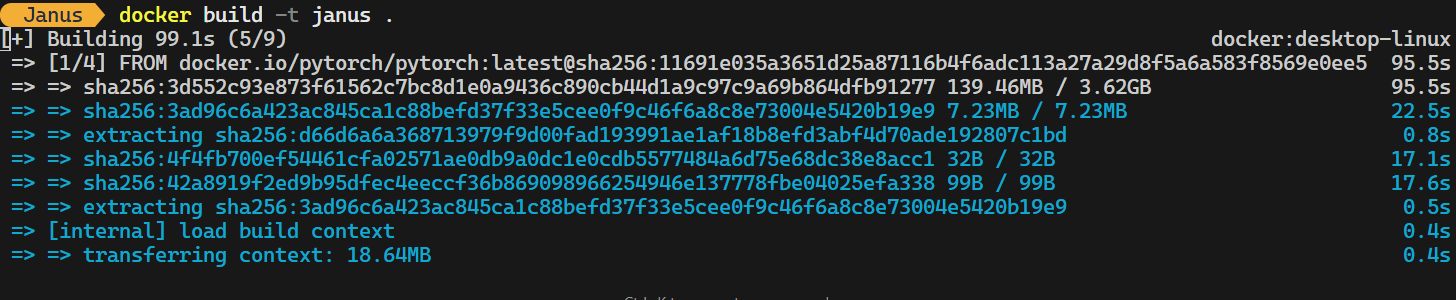
Type the following command in the terminal to create the Docker image. This command will use the Dockerfile located in the root folder and assign the name janus to the image:
docker build -t janus It takes 10 to 15 minutes, based on your internet speed, to build the image from scratch.
The following command starts a Docker container for the Janus application. It enables GPU support, maps port 7860 for accessing the Gradio app, and ensures persistent storage for Hugging Face model files.
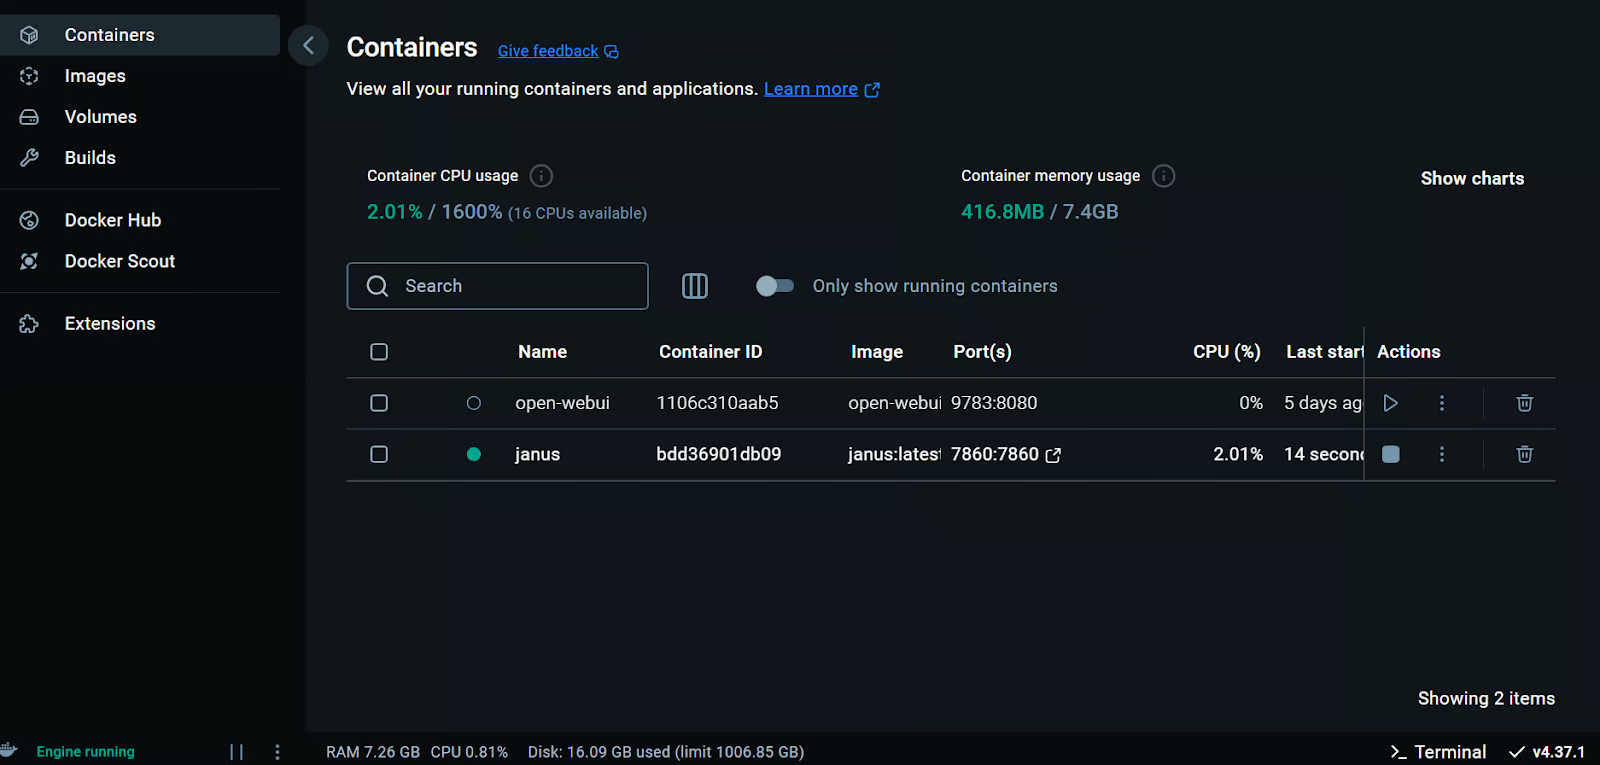
docker run -it -p 7860:7860 -d -v huggingface:/root/.cache/huggingface -w /app --gpus all --name janus janus:latestIf you open the Docker Desktop application and navigate to the “Containers” tab, you will see that the janus container is running. However, it is not yet ready to use.
To check its progress, click on the janus container and then go to the “Logs” tab. Here, you will notice that the container is downloading the model file from the Hugging Face Hub.
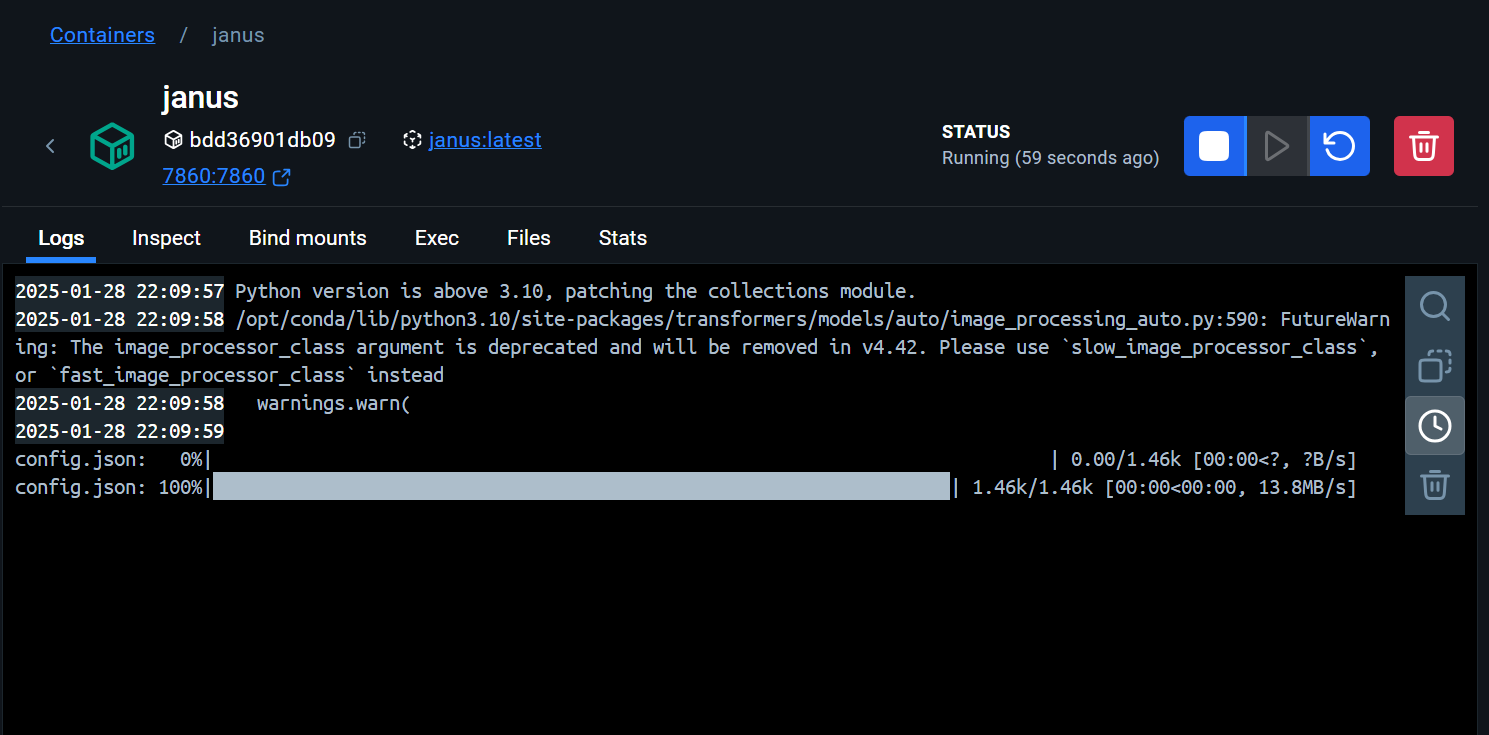
Once the model has been successfully downloaded, the logs will display a message indicating that the application is running.

You can then access your application by visiting the following URL in your browser: http://localhost:7860/.
If you are experiencing issues, please check the updated version of the Janus project at kingabzpro/Janus: Janus-Series.
Testing the Janus Pro Model
The web app has a clean interface, and everything appears to be working smoothly. In this section, we will test the Janus Pro’s multimodal understanding and text-to-image generation capabilities.
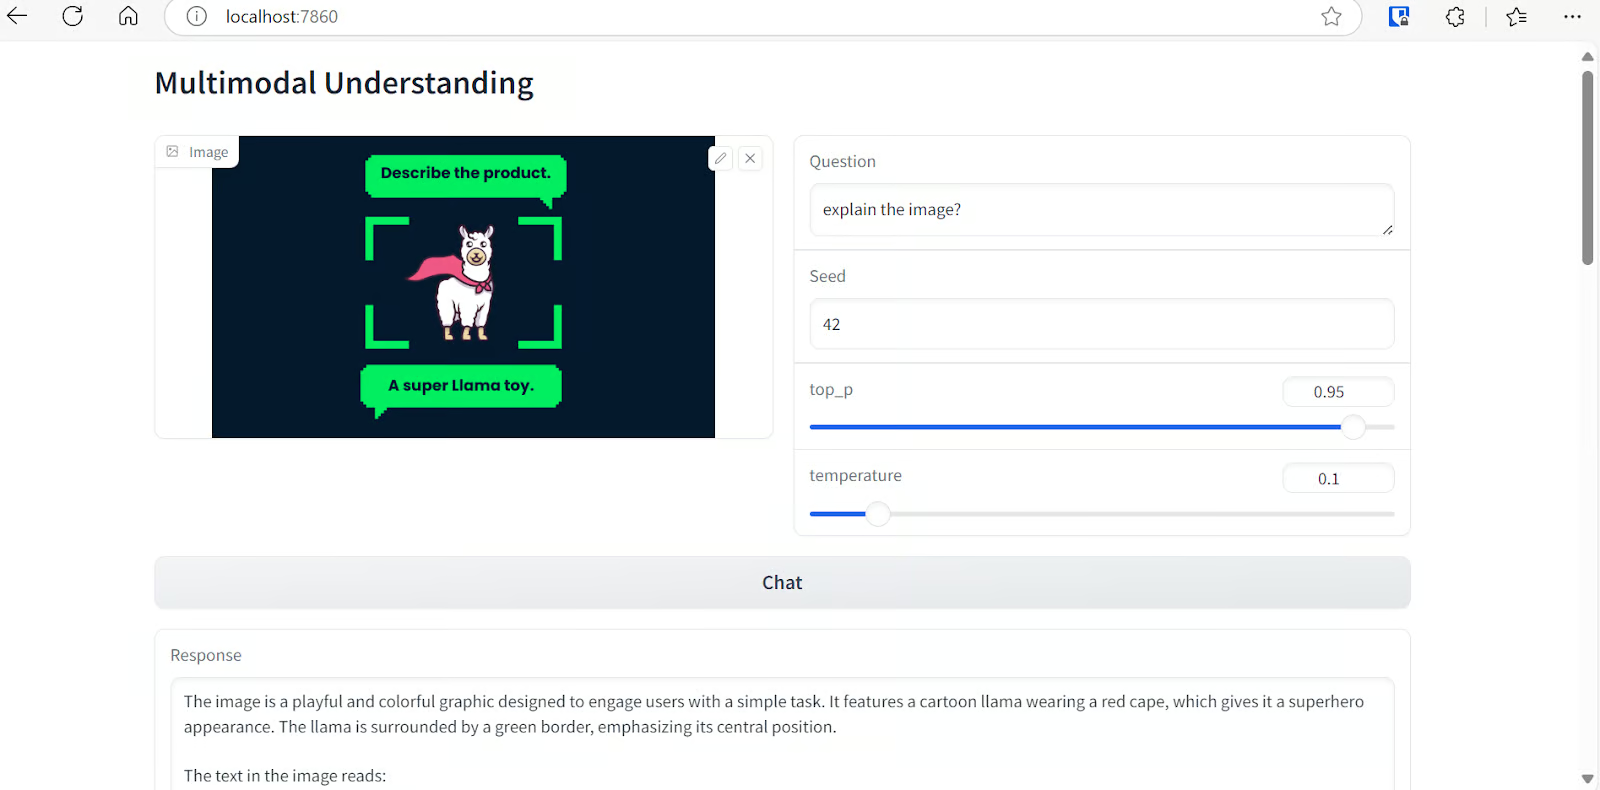
Testing the multimodal understanding
To evaluate the model’s multimodal understanding, we first load an image from the DataCamp tutorial and ask the model to explain it. The results are impressive—even with the smaller 1B model, the response is highly accurate and detailed.
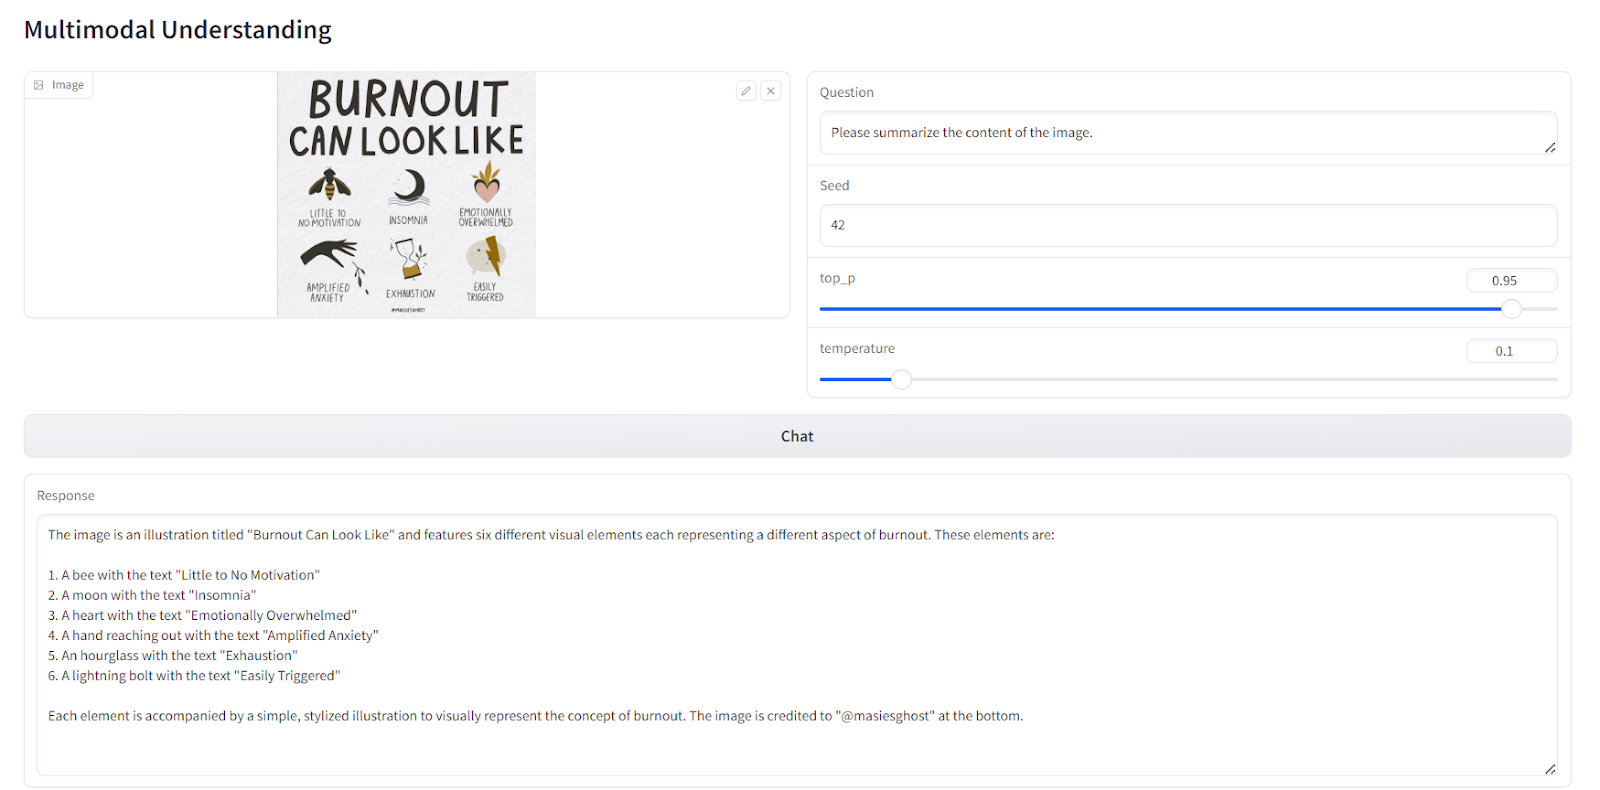
Now, we load another image and ask the model to summarize the content of an infographic. The model successfully understands the text within the image and provides a highly accurate and coherent response. This demonstrates the model’s strong ability to process and interpret both visual and textual elements.
Testing text-to-image generation
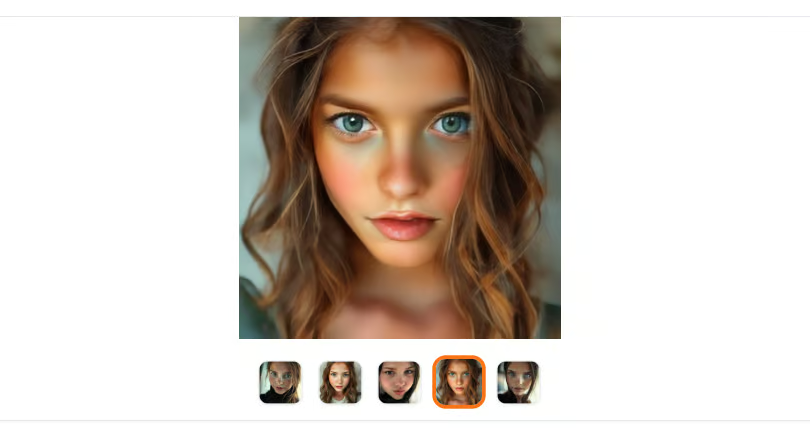
Scrolling down the app, you’ll find the “Text-to-Image Generation” section. Here, you can enter a prompt of your choice and click the “Generate Images” button. The model generates five variations of the image, which may take a few minutes to complete.
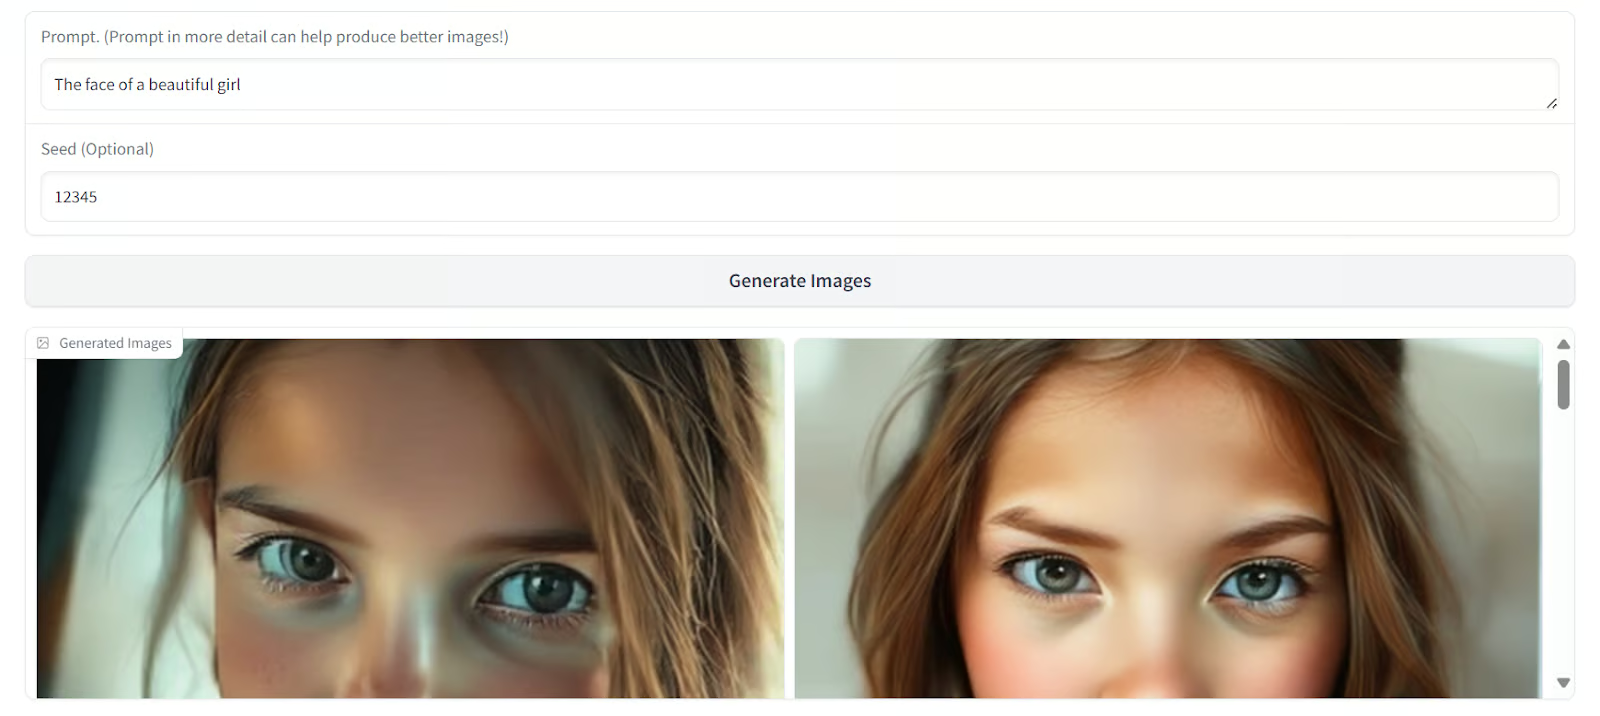
The results are remarkable, producing outputs that are comparable to Stable Diffusion XL in terms of quality and detail.
You can learn how to Fine-tune Stable Diffusion XL with DreamBooth and LoRA on your personal images.
Let’s try another prompt:
Prompt:
“The image features an intricately designed eye set against a circular backdrop adorned with ornate swirl patterns that evoke both realism and surrealism. At the center of attention is a strikingly vivid blue iris surrounded by delicate veins radiating outward from the pupil to create depth and intensity. The eyelashes are long and dark, casting subtle shadows on the skin around them, which appears smooth yet slightly textured as if aged or weathered over time.
Above the eye, there’s a stone-like structure resembling part of classical architecture, adding layers of mystery and timeless elegance to the composition. This architectural element contrasts sharply but harmoniously with the organic curves surrounding it. Below the eye lies another decorative motif reminiscent of baroque artistry, further enhancing the overall sense of eternity encapsulated within each meticulously crafted detail.
Overall, the atmosphere exudes a mysterious aura intertwined seamlessly with elements suggesting timelessness, achieved through the juxtaposition of realistic textures and surreal artistic flourishes. Each component—from the intricate designs framing the eye to the ancient-looking stone piece above—contributes uniquely towards creating a visually captivating tableau imbued with enigmatic allure.”

Again, the results are amazing. The generated images capture the intricate details and surreal artistic elements described in the prompt.
Source: Datacamp, Abid Ali Awan
Video: Data Science in your pocket